Your hair is the crown you wear. It may look naturally gorgeous, but what makes it stand out is styling. It’s tough to keep up with all the different hairdo fads that have come and gone over the years. But one thing is for sure – for what seems like an eternity, braids have been a staple in the history of hairstyles.
But braids are tricky to achieve. Even so-called “simple” braids necessitate some hair wizardry or superhuman hand power. And braiding your own hair can be slightly tough (doing it for others seems easier). Not only does keeping braids tight require extreme accuracy and dexterity, but depending on the style you’re going for, you may need to view your head from various angles – without your eyes at the back of your head. Nevertheless, it is not impossible to do it. Here are six braid styles you can experiment on with your hair.
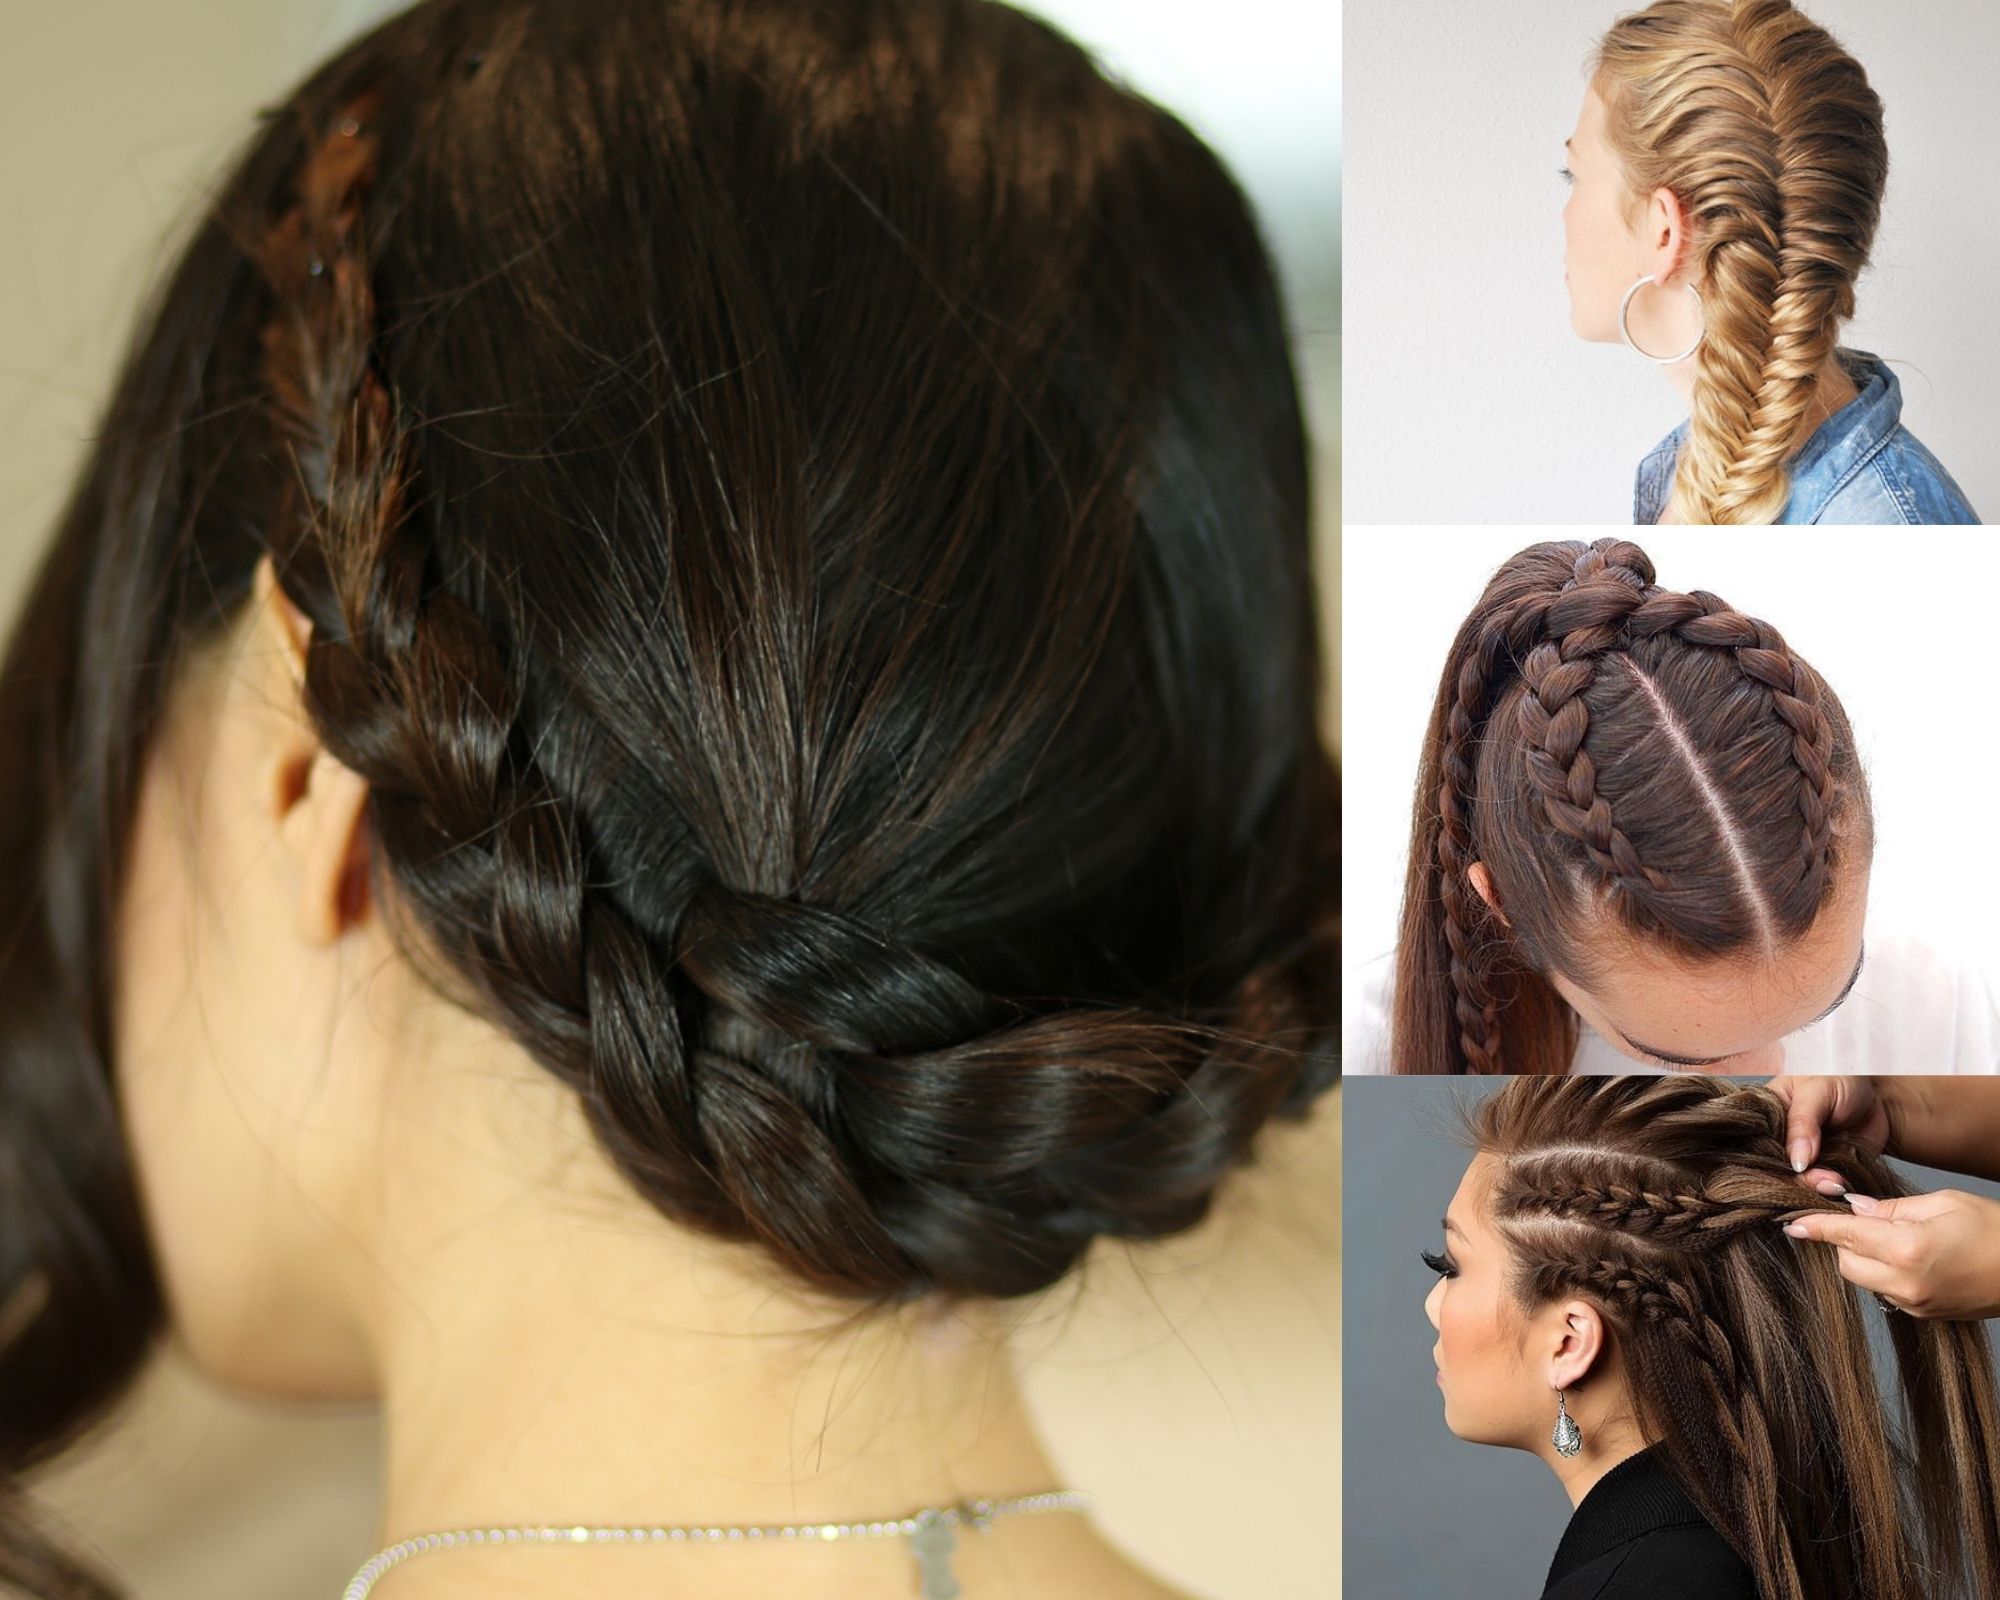
1. Fish Tail Braid
The fish tail braid is way easier than it looks. Separate your hair into two pieces to achieve this appearance. It normally takes approximately 10-15 minutes to complete (depending on how fancy you want it).
Step 1: Brush your hair and split into two even sections.
Step 2: Pass one strand from beneath one of the sections to the other. To get the pattern seen in the image above, repeat the process on both sides.
Step 3: Continue down the length of your hair, securing it with a hair tie.
Step 4: Curl any shorter layers or bangs with a curler. You can skip this step if you have natural curls or want a messy-natural look.
Step 5: Any lengthier layers that didn’t get it into the fishtail should be braided into a three-strand braid and tucked and pinned into the fishtail.
2. Dutch Braid
The Dutch Braid is similar to a French braid, except that instead of sliding the hair over each strand, it is braided beneath them. This permits the braid to sit on top of the head rather than weaving in an inverted pattern towards the head.
Step 1: Divide your hair into three sections.
Step 2: Braid the pieces in a “left under, right under” pattern, weaving the left piece of hair under the center piece, then the right piece under the center, grabbing and adding little sections of hair as you go.
Step 3: Continue along the back of your head, adding hair from your roots. Use an elastic band to keep it in place.
Step 4: If there’s excess hair, just pin it towards the middle.
3. Braided Ponytail
This style is like a regular ponytail. The only difference is it’s braided. Opting for this hairstyle gives your hair more volume and of course, makes it look cooler. This is such a fierce twist on the classic ponytail braid. If you don’t want a messed-up look, don’t loosen the braids too much.
![]()
Step 1: Section your hair.
Step 2: Starting from the right section, do a Dutch braid.
Step 3: Loosen your braids just a teeny bit by pulling it gently.
Step 4: Take a section from the middle and do the usual three-strand French braid.
Step 5: On the left side, twist the hair and secure it with an elastic band.
Step 6: Pull all your hair like how you would a regular ponytail and tie it up.
4. Low Ponytail Braid
This could make your arms hurt, but it’s definitely worth the pain. Doing a Dutch Braid backwards is kinda hard. To make it easier for you, set up a mirror to help you see the angle. This style is cute and suitable if you’re going for a neutral look. Since you’re going for a clean look, you don’t have to loosen your braids.
Step 1: Divide your hair into three sections.
Step 2: Grab the middle section and do a Dutch braid.
Step 3: Braid all the way down, making sure the braid is tight.
Step 4: As you go on braiding, tucking in extra strands of hair to give a thicker look.
Step 5: Once complete, secure the braid.
Step 6: Start a second Dutch braid on top of the previous one with the remaining hair from the left and right sides.
Step 7: Continue tucking in more hair strands till the braid is complete.
Step 8: Secure it tightly.
5. The Milkmaid Braid
Many ladies who prefer the bohemian style have turned to the milkmaid braid. A milkmaid braid is one of the simplest braided updos to achieve, and it’s perfect for spring and summer. It’s a style of braid with a neat center part that wraps around the head. It is made by creating two pigtail braids and then wrapping them up and around, crossing them over the top of the head.
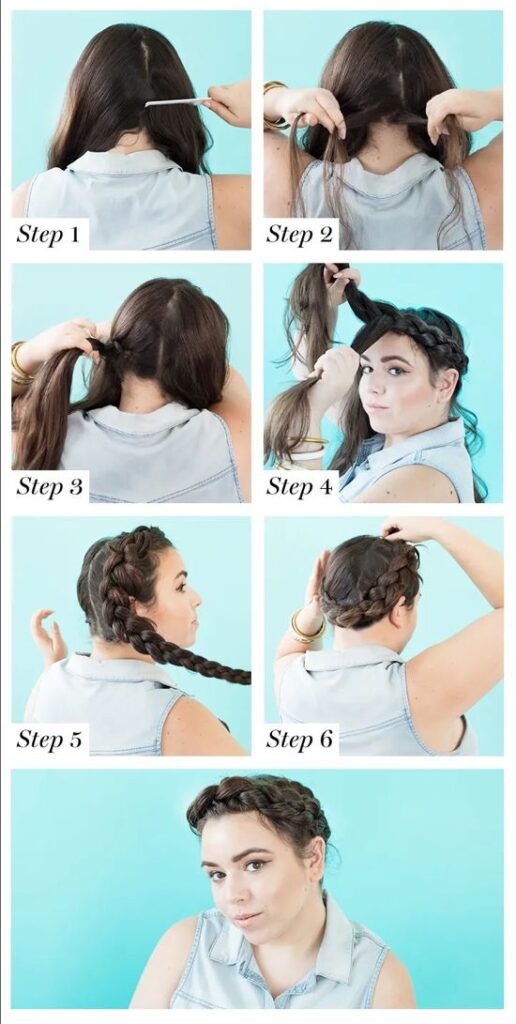
Step 1: Section your hair in the middle to two equal parts.
Step 2: From the left section, grab the hair and section into three parts.
Step 3: Following the Dutch style, braid your hair while adding strands of hair as you go.
Step 4: Braid around your hairline and secure it at the top of your head.
Step 5: Do the same thing on the right side. Secure it, making sure the two braids meet.
Step 6: Wrap the end of the second braid around the first and pin it in place.
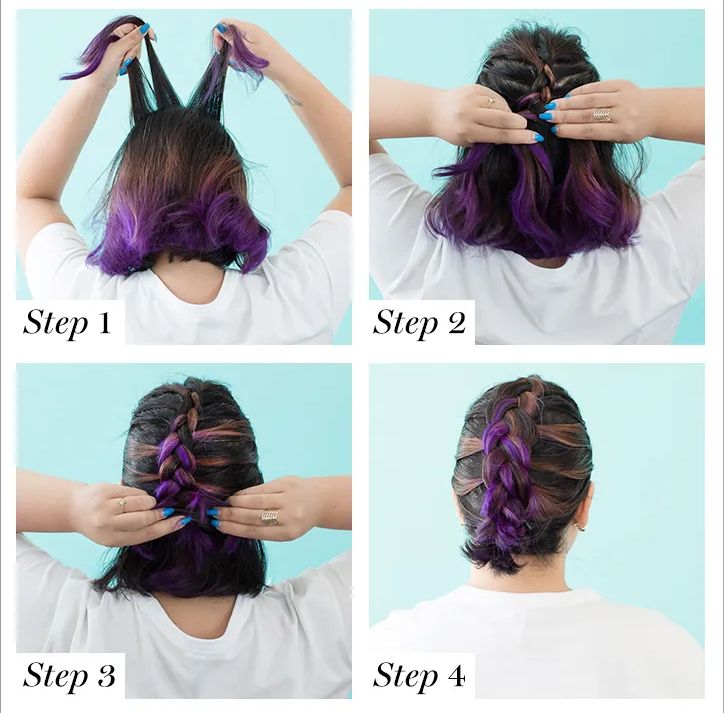
6. Upside Down Braid
The French braiding technique is used once more, but this time, you’ll start at the nape of your neck and work your way up. It can be easier to completely flip your head over if you’re doing it on yourself. The hardest part of this style is definitely braiding upside down and you’re also not able to see what you’re doing (trust your instincts, I guess!). So, no rush – and take your time to do this braid.
Step 1: Tilt your head down. Take a large section of your hair and split into half.
Step 2: Braid the left section upwards and do the same with the right section.
Step 3: Tilt your head up and pull your hair into a high ponytail.
Step 4: Twist the ponytail into a bun and secure with bobby pins or elastic bands.
More on hairstyles? Read this:
https://lipstiq.com/hair/193641/cant-think-straight-hairstyles-you-can-create-with-a-straightener/