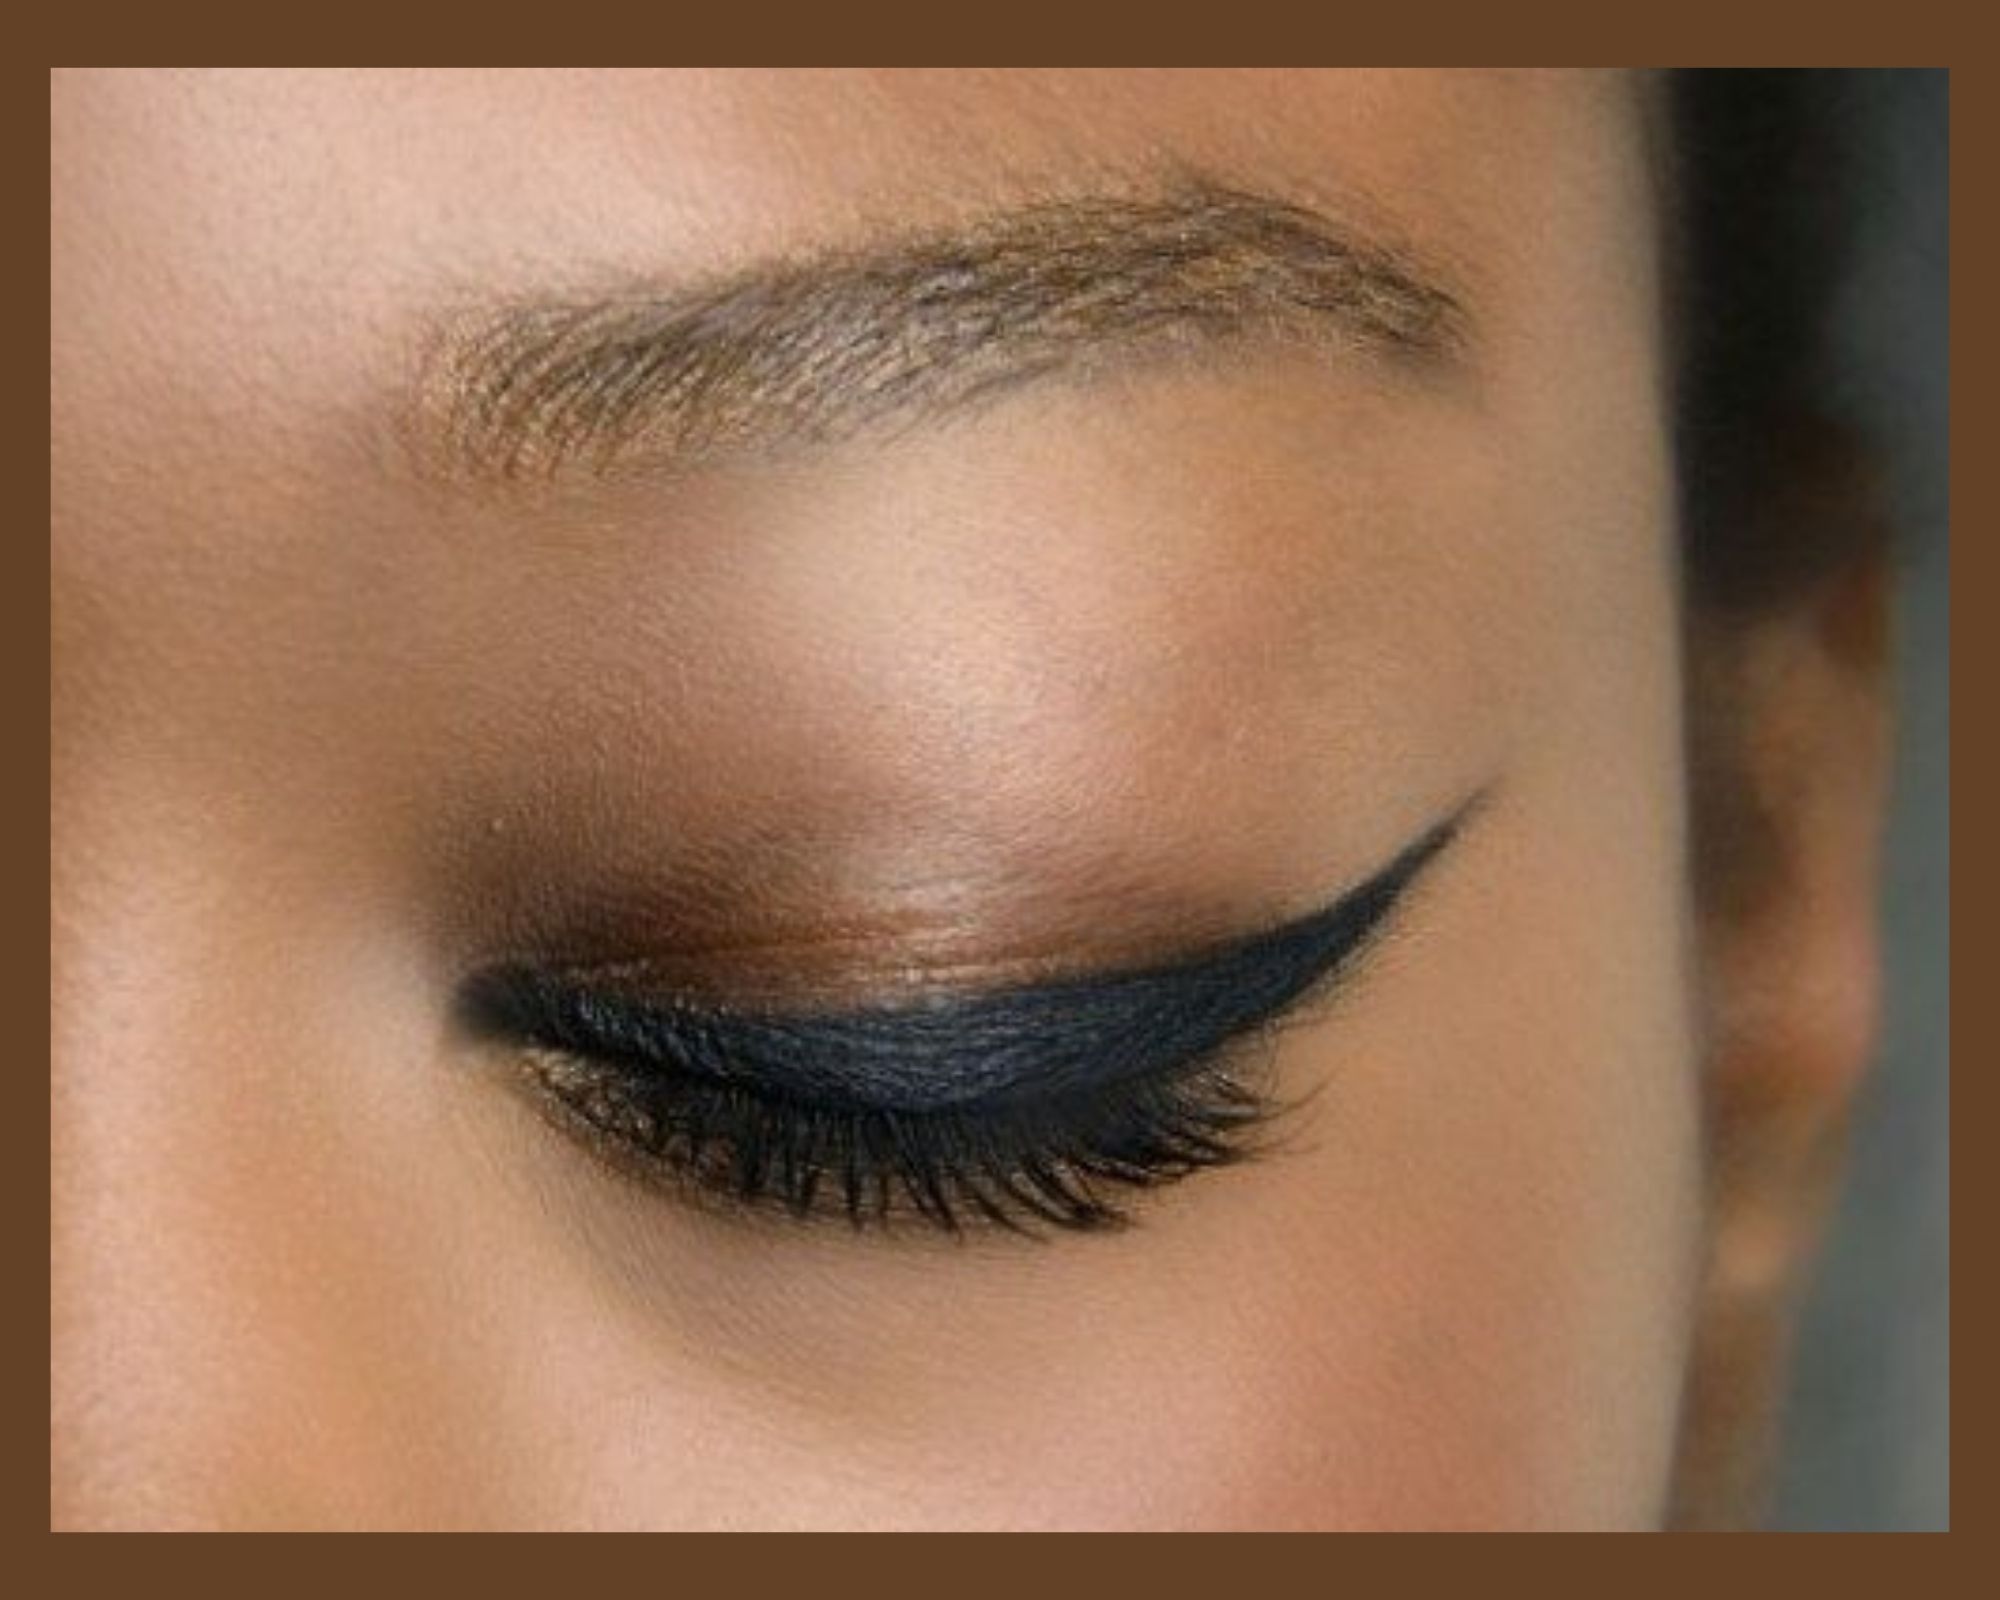
Still haven’t perfected the winged eyeliner? You’re not alone, girl!
Women stress over the winged eyeliner, which is completely understandable – because it brings your entire look together. Even if you don’t apply full makeup, a simple eyeliner can usually suffice. The fact is, getting that cat-eye appearance right is one thing. The problem is, you have to get it right on BOTH eyes – and that’s just intense pressure!
Frustrating, isn’t it? But what if we told you, there are some tricks (as in tools) you could use to get that perfect winged eyeliner? Yup, there are! With these simple tools, you can perfect a winged liner and look absolutely fab!
1. Bobby Pin
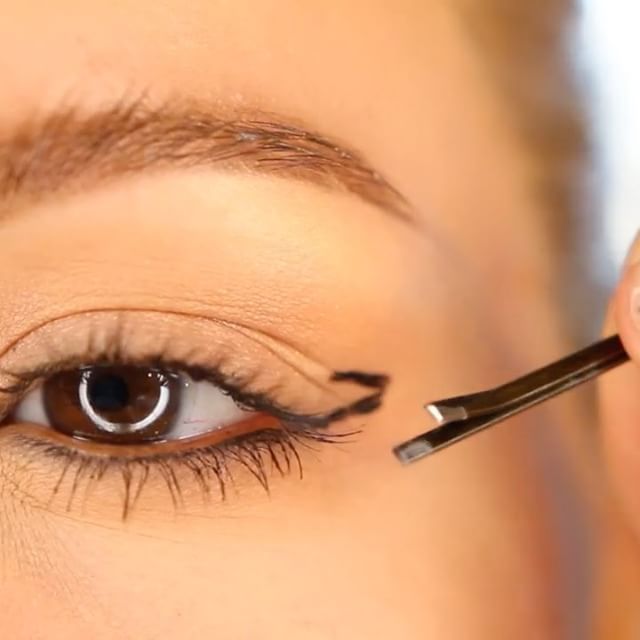
This is one of the most mundane tools imaginable – but it can serve a vital role. To use this technique, apply your liner to the bobby pin’s naturally-shaped triangular end and place it at the corner of your eye. Once you’re satisfied with the setting, press down to leave your liner’s imprint. Then, using the imprint as a guide, fill in the rest of the gap, and you’ve got yourself a flawless winged liner with no effort.
2. Dental Floss
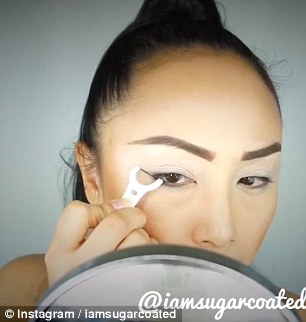
The tool used to clean between your teeth is ALSO handy for creating the perfect winged liner. All you have to do is grab a dental floss thread, dab some liquid liner on it, and use it to draw a precise line in the corner of your eyes before it dries. Once done, use that line as a guide to connect your liner and create a stunning eyeliner look.
3. Cards
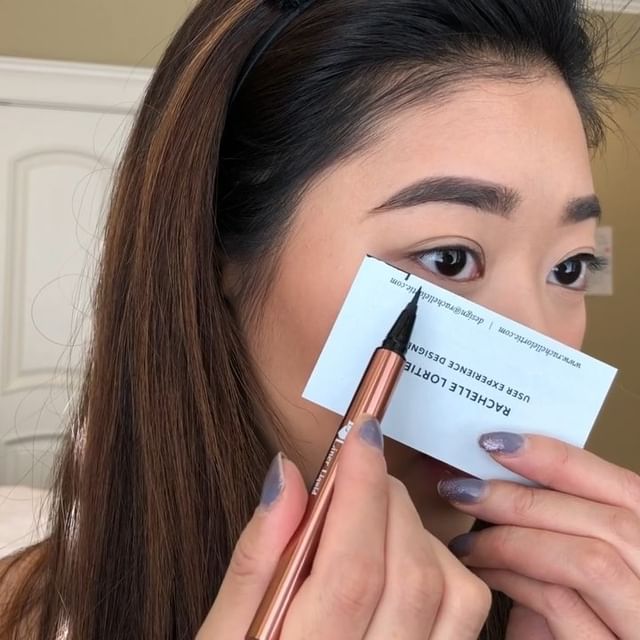
This hack is right in your bag – or, to be more precise, your purse! Whether it’s a business card, credit card or debit card, its enough to do the trick. Place the card against the outer corner of your eyes, angled toward the end of your brows. The card’s sharp edges will assist you in drawing the precise line.
4. Tape
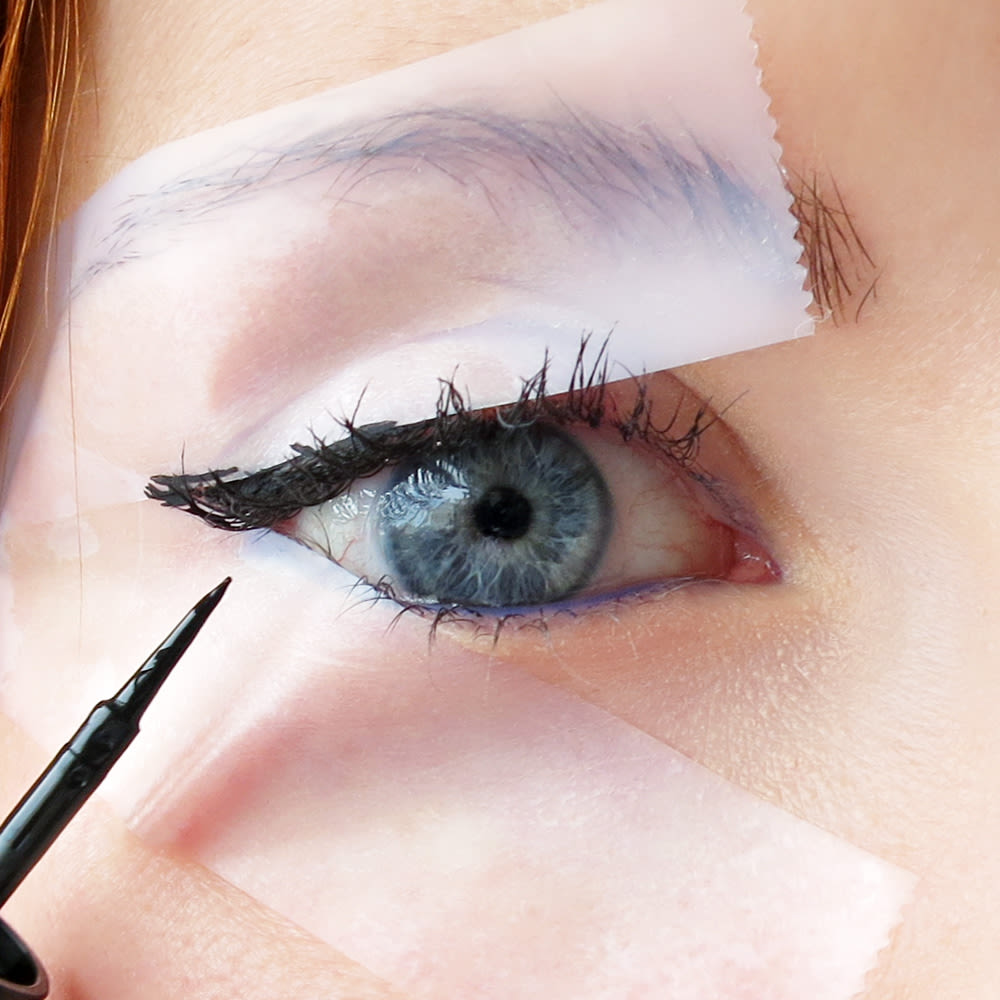
Similar to cards, draw the base of the wing with a piece of tape between the corner of your eyes and the furthest edge of your brow. Another way to use tape is by affixing a long length of it from one corner of your eye to the other corner of your eye, under the nose, and back. To construct the needed shape for the wing, insert two pieces above the eye as well. Fill in the space left by the tape with a standard liquid eyeliner. It is better to use cellophane tape or medical tape, as they can be easily removed.
5. Fork
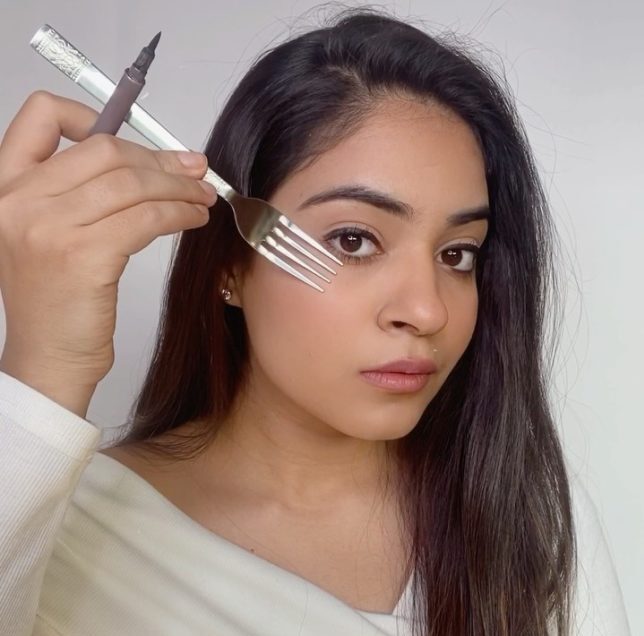
Let’s head to the kitchen! This hack requires lots of caution. After selecting whatever angle you’d like to situate the wing at, press the edge of a fork against your eyelid and apply liner on it. That’s all there is to it! Draw a line down your upper eyelids and link it to the wing, and you’ve got yourself a gorgeous winged liner.
6. Q-tips and Eraser
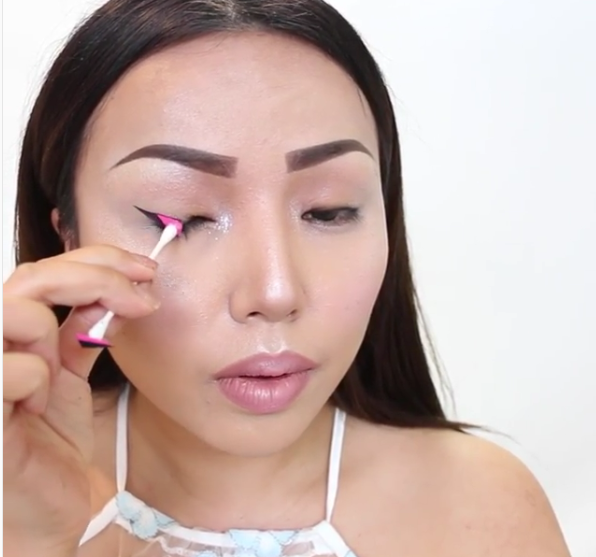
This needs a slight bit of work. Stamp liners are kinda of a thing now – but why waste a few sen when you can make your own? Just cut the edge of an eraser to look like a triangle and then attach it to a Q-tip using glue for a temporary grip. Dip the eraser into a gel liner pot or simply apply some gel liner to the eraser and place it in the corner where you’d like your wing to go. Mark the spot and stamp! Also, feel free to cut the erase according to the size you want.
More on eyeliner? Read this:
Just Wing It! Try Out These Popping Eyeliner Looks That Will Surely Catch Eyes

