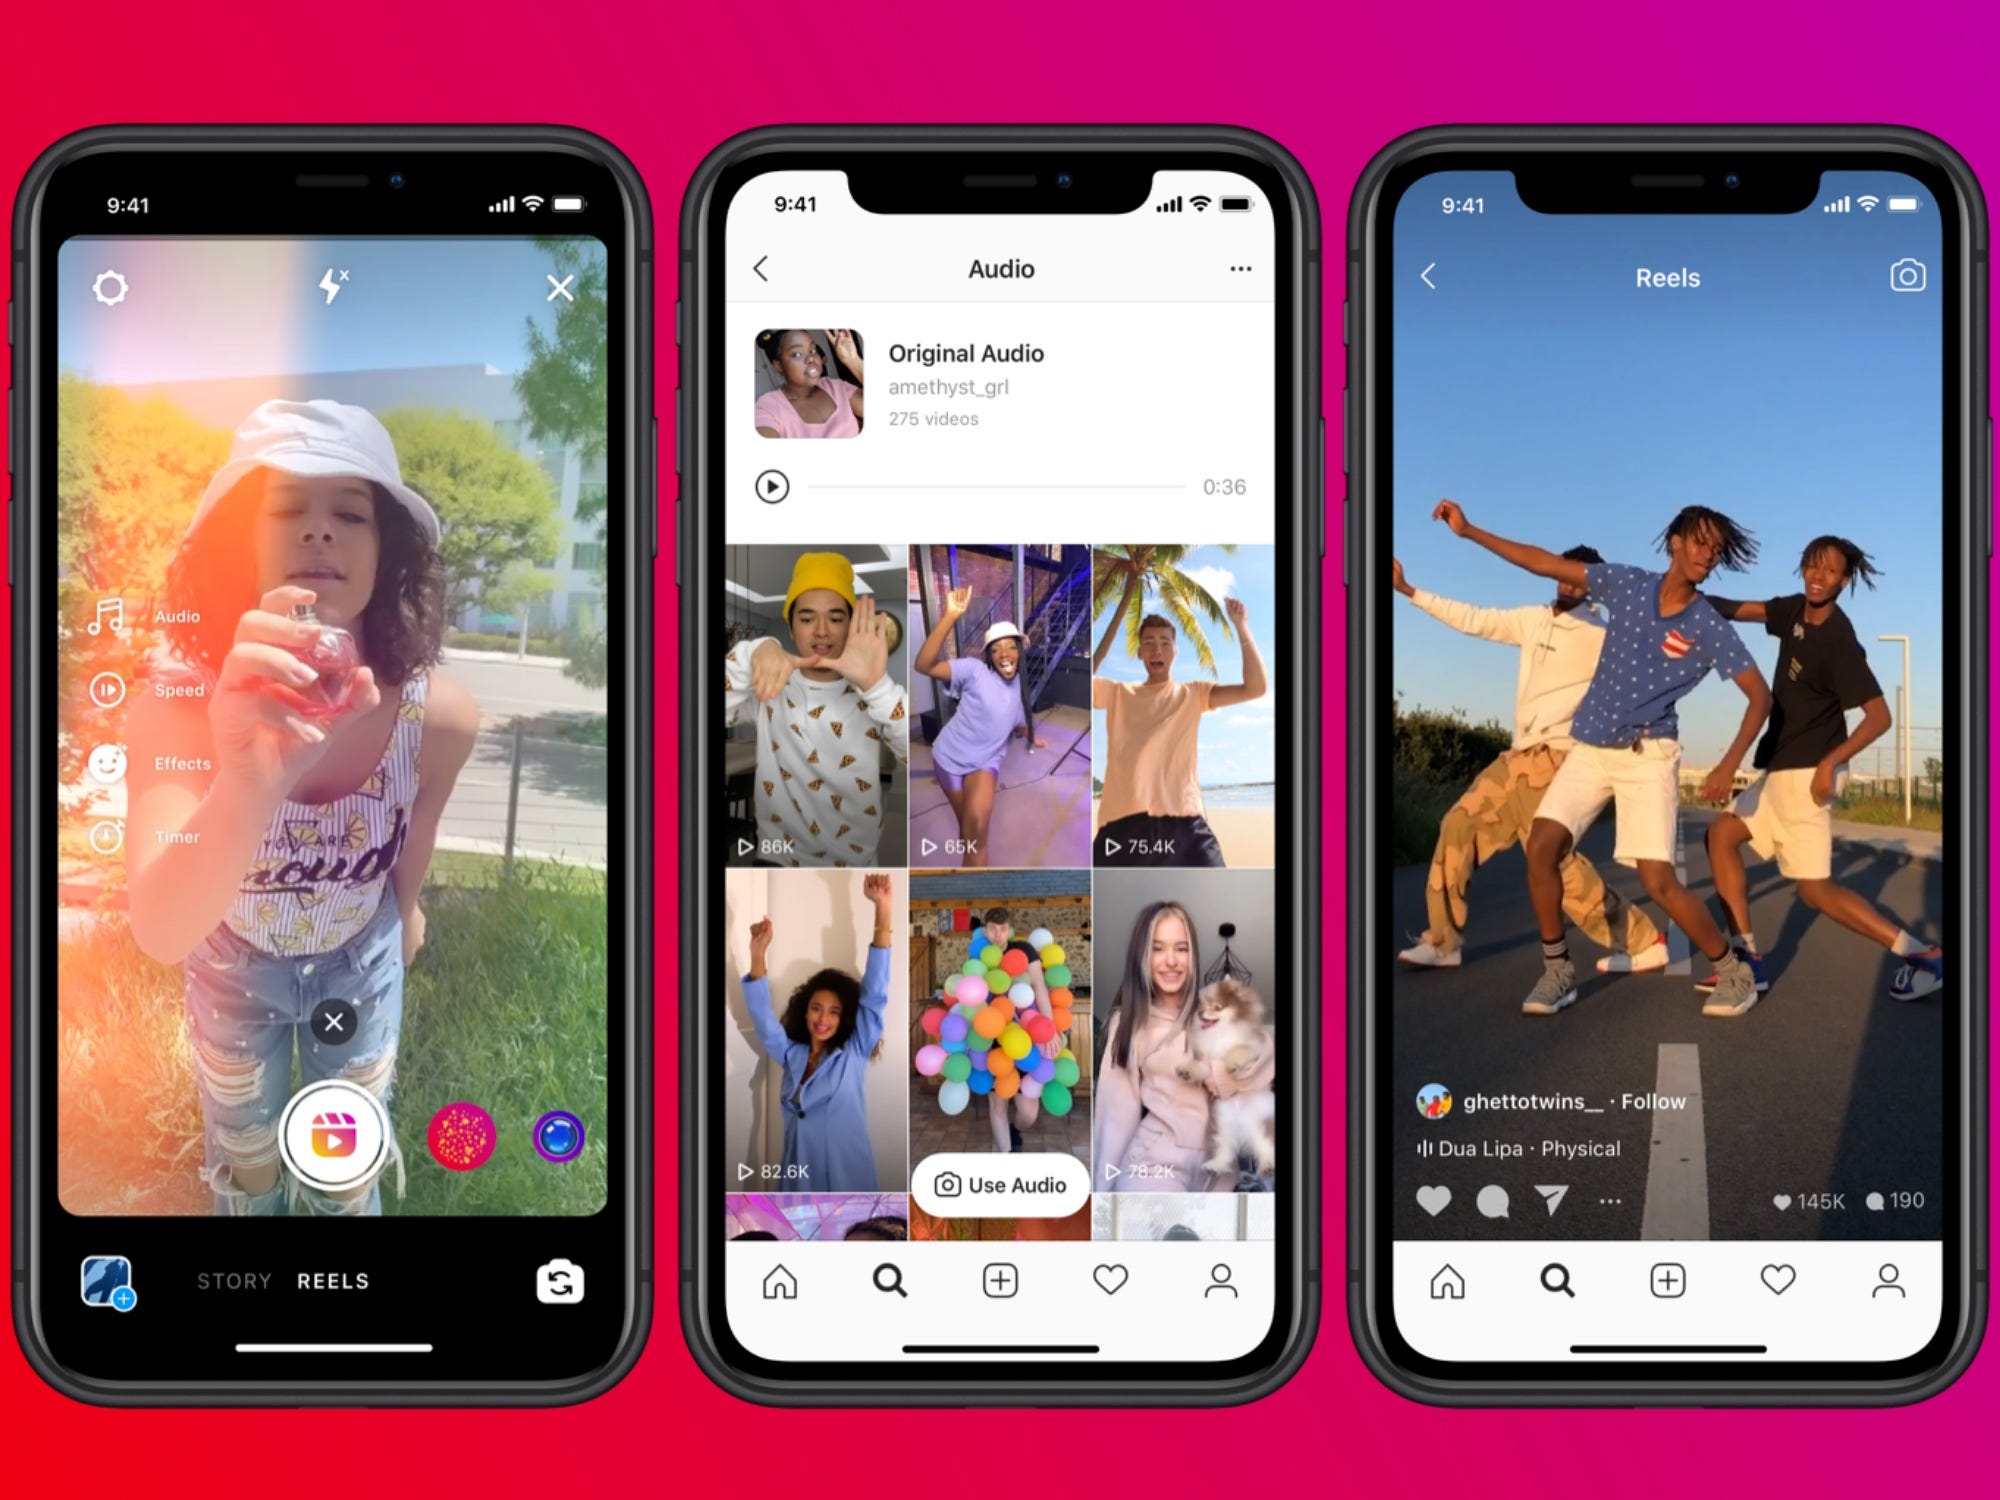
Been wondering what’s all the hype surrounding Instagram Reel and why is everyone super pumped about it? Even you will join the bandwagon once you get yourself familiarized with this step-by-step guide. Basically, Reel is a feature in Instagram which allows you record and edit a video up 30-seconds, using music, effects and other creative tools to enhance your video.
There’s no denying that this feature is very similar to TikTok, however, many say that Reel allows you to be more creative with your videos. Some of Reel videos which have been a hit consist of dance sequences, lip syncing and change of clothes with a click of a finger.
If you’re a content creator, using Reel is the perfect start to further grow your Instagram, as it will expose your content to a wider group of people through Instagram’s explore page. If your Reel has been featured you’ll receive a notification.
This turoial will get you uploading videos like a pro in no time. So, it’s time to get your Reel on!
1. Slide left to your Instagram camera
To access through the Reels tab, tap the camera on the top right.

To access through the Instagram home screen, tap the “+” on the top right and scroll to the Reels tab at the bottom of the screen.

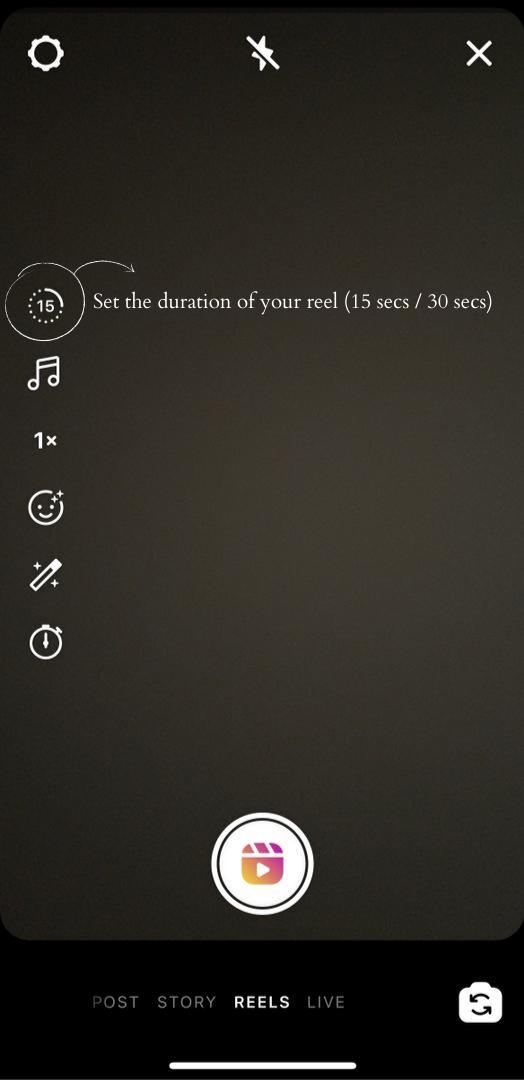
2. Set your Reels duration
You can choose a duration of 15 or 30 seconds
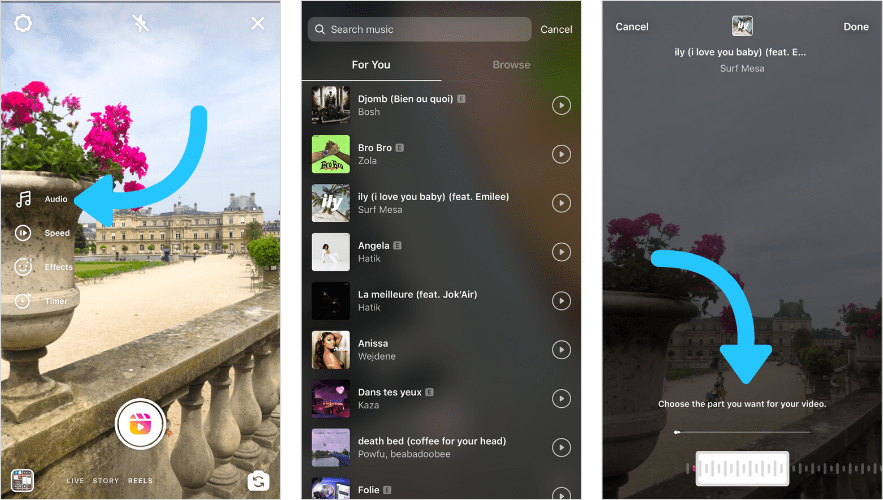
3. Choose the music you like
There’s a library of music for you to choose from.
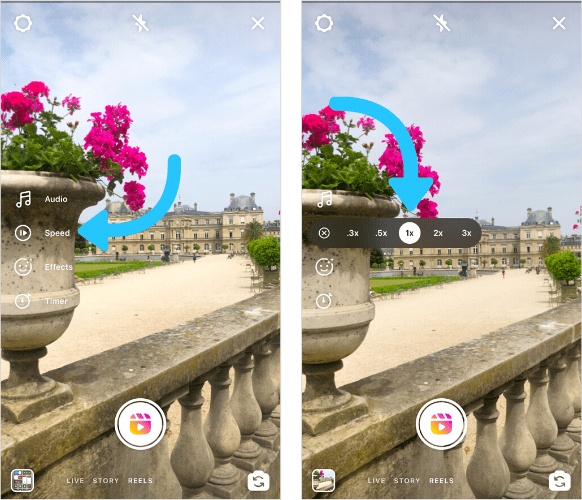
4. Choose the speed of your Reels
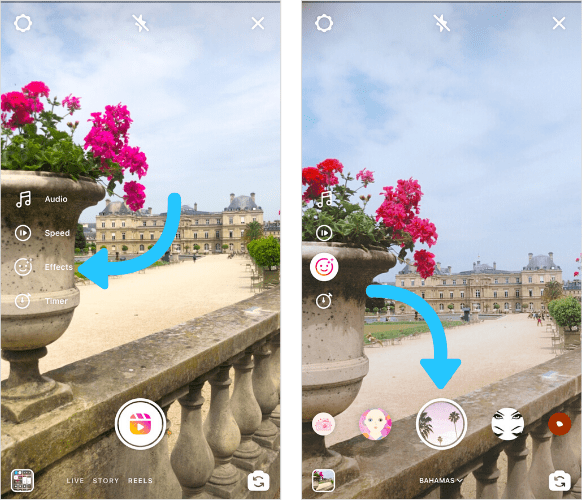
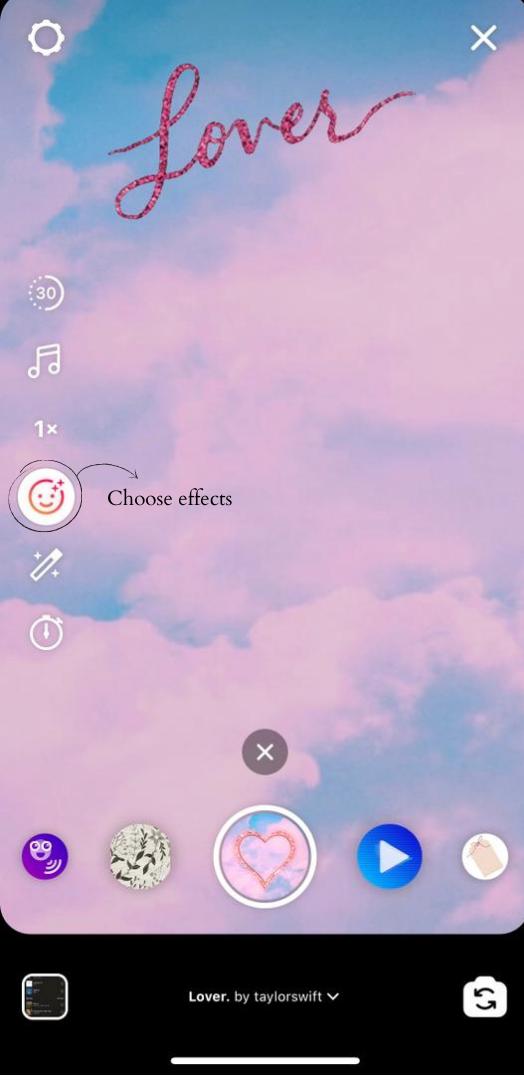
5. Choose Effects For Your Reels
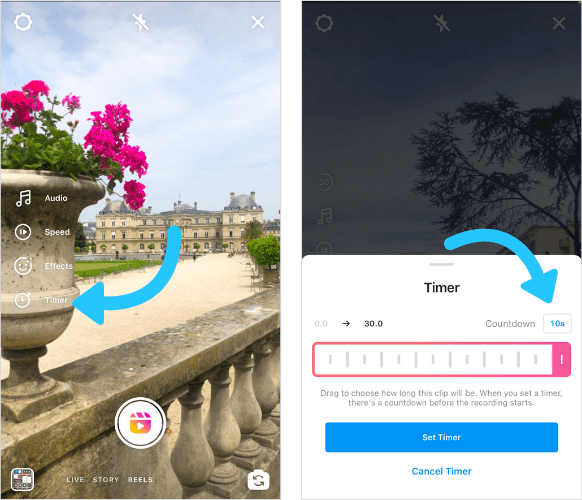
6. Set a timer for your video
When you set a timer, there’s a countdown before the recording starts. You can choose between a 3 second and 10-second countdown.
Change the countdown duration by tapping the number next to “Countdown”.
If you already have a pre-recorded video, you can go straight to the editing tools and finalize your content.
When finished, you can edit the cover photo with a video thumbnail or add a cover from your camera roll.
Once you’re happy with the result, click upload and it’s live! You can share the Reel to your Stories, Explore Feed, and the new Reels tab on your profile.

